Sunday, September 30, 2012

Color My World Neon!


I've had my new Hero Arts neon inks for a little while now and I wanted to share some ideas for them.  If anyone has an idea about how to present the neon colors on the computer, please share those with me, because these scans definitely do not look neon!  But the cards do (in reality, rather than virtuality).  The first card, above, is a copy of one that Lisa Spangler presented on her blog Sideoats and Scribbles.  You can see her original post here:  http://sideoatsandscribbles.wumple.com/2012/06/28/dazzling-neon/
I used a stamp from Penny Black instead for the sentiment.  

Below is another take-off on one of Lisa's ideas.  You can see her original card here:   http://sideoatsandscribbles.wumple.com/2012/07/12/heidi-swapp-swap/
I didn't have a lot of embossed paper, so I made my own with heat embossing and white ink and powder for the pink and orange strips below.   Also, the moon is heat embossed in white and then covered with yellow neon ink.  The die shape is from Spellbinder's.  All stamps from Hero Arts.  


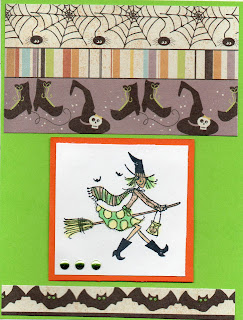
This last card features a Hero Arts witch from an older clear set.  I stamped her in black and then colored her with neon inks with my Fantastix blending sticks.  Also the bats' eyes!  You can see that I colored the ghosts eyes in the card above the same way.  


I love my neon inks!  I got all the colors:  yellow, green, orange, pink, blue, and purple.  And I am so glad I have them in time for Halloween.  They are the perfect colors for the season.  I am now looking for all things neon--papers, markers, embellishments.  I think they are my new fave!  Happy October!


Monday, September 17, 2012

Inchie Art

Since I have an Inchie class coming up Saturday, I thought I'd share some Inchie projects I have done in the past.  What is an Inchie?  It's a tiny 1" square work of art, either created on it's own or punched from a larger piece of art.  It can be part of a grouping to help build a card or scrapbook page, or just be a clever stand-alone piece of art.
This first piece is a thank you card made from a clear set of stamps from American Craft.  Very purple!  I like the dimension I built into the card using pop dots.  I also like how I made the THANKS greeting into two inchies with a punch stroke!  Some of the inch squares are stamped, some are run through an embossing folder, to give variety.


The next card uses some kitchen paper and a set of clear stamps from Amuse with a kitchen theme.  I thought of a kitchen cabinet so I encased my inchies into a "cabinet" I made with narrow strips of foam.  Again, I liked using pop dots to raise some elements of the squares up for dimension.  Lots of delicate cutting on this piece!  Another unique feature of this piece is how I cut up bits and pieces of a discarded dictionary to add text elements.


This last card uses the foam strips and the text elements used above but this time makes a dress shop "window".  The stamp is a row of cute little girl dresses, each stamped on inked and distressed paper.  


Inchies are one of my favorite art forms.  I love arranging those little squares into mosaic style cards and scrapbook pages.  I read on a Flickr Inchie site on the web that you can keep your Inchies in coin collection plastic pages--the size for quarters.  Inchie supplies can be bought from Ellen Hutson LLC, who stocks items from Inchie Arts and Lockhart stamps.  Inkadinkado makes a lot of Inchie clear stamp sets--the easy way to approach Inchie Art!  Good things come in small packages!


Tuesday, September 4, 2012

Crown Jewels ATC's


The theme for this month's ATC trade was "Crown Jewels".  I made all sorts of glittery goodness, as you can see in the photo above.  I used 2" sized chipboard squares and heat embossed them with Clearsnap Copper pigment ink and a combination of Ranger UTEE, gold and copper embossing powders.  While the layers of embossing powder were still hot I impressed a crown stamp (Postmodern Design) into the molten mess.   I then used red and ginger alcohol inks to add to the color.  This is a very fun technique--making deep thermal embossed tiles.  The fun part is sprinkling in all sorts of different powders for a unique look.   To further embellish the tiles once they were on the inked, stamped, and be-ribboned cards, I added tiny gold beads with Glossy Accents as an adhesive.  They really look like treasure!  Lastly, I composed a bit of prose to add some text to my creation.  I had fun at the trade.  All the cards were imaginative and the company fun to be with.  ATC's--a way to share your art with others.

Saturday, September 1, 2012

Halloween Shadowbox: Thank you Memory Box!


I have wanted to make this Halloween shadowbox ever since I saw it on the Memory Box Blog.  Last year I even ordered most of the stamps to make it.  I worked on it yesterday at Karen's fun craft room and finished up today.  It has lots of Halloween gleam and glitter.  You can see the original at this link:  Memory Box Spooky Printer's Tray    I used a printer's tray from Hobby Lobby instead of the 7 Gypsies one used in the original project.  The basic papers I used were from the Memory Box Nightfall collection.  I added stamps from Hero Arts, Inkadinkado, and Amuse in addition to the ones from Memory Box.  I did not have any Halloween Design Adhesives, so I used strips of green glitter paper for sparkle.  I also wanted some text, so in addition to some stamped words, I used a Cricut cartridge called "Word Collage".  The Halloween selection was perfect!  I cut some text in black and some in orange glitter paper.   All background papers were adhered with Perfect Paper Adhesive Matte from USArtquest.  I used a foam brush to apply the adhesive directly to the shadowbox.    Here are some closeups of various sections:


In the section above, I worked at the "Spooky Collage" technique, which is shown on the Memory Box blog.  It was a lot of fun!  Karen and I made three spooky collages and used one of them in the Shadowbox.  It is basically a technique where you make a "waxy buildup" of clear embossing powder, stamp on top of it in black ink, and then embellish with alcohol ink.  You can check out the technique specifics here:  http://davebrethauer.typepad.com/stampcolorcreate/2010/08/the-spooky-collage.html  Karen and I found that the collage stamp worked better if you used pigment ink and then heat embossed it also in clear ink before adding the alcohol ink.  We just had to be careful not to let the built up pool of clear melted powder melt any further!  This way we didn't have to wait for the ink to dry before adding the alcohol ink.


In the section above, you can see the very cool "cat in the spotlight" technique, which is described in the original Memory Box project here.  I used Tim Holtz Black Soot (a freshly re-inked pad) and a foam applicator to make the shadow.  I masked the spotlight with Eclipse Tape.   Can you find the following:

  • hanging ghosts from Penny Black embossed in white?
  • an orange glitter moon behind an Inkadinkado haunted mansion?
  • some owls displayed in front of some shiny orbs painted with Smooch paint?


In the section above you can find some spooky Inkadinkado spiderwebs heat embossed with Mystic Fire embossing powder from B & J Art Stamps.   You can also see a golden Hero Arts chandelier with some colorful Stickles accents.

Lots of fun!  I really enjoy making these.  I had intended it for use initially to house my Hallmark Merry Miniatures Halloween collection, but they just didn't look right and some were a little large for the printer's tray.  So my next idea is I will use it to house Halloween costume jewelry I have collected over the years.  That will make it very sparkly!  If I adhere the jewelry pieces (pins, earrings, etc) with hot glue I don't think it will get damaged if I ever decide to wear any of it again!  I prefer to look at my jewels rather than wear them on my person any day!  This project will be a great backdrop for my pretties!