Sunday, August 31, 2014

Go Wild!

Having been out of things for a while, I hadn't checked out the latest Hero Arts stamps until late July or August.  Not only did I then get the cool blackboard stamp featured in the previous post, I also got a digital kit called "Go Wild".  Here is the first card I made with that kit:


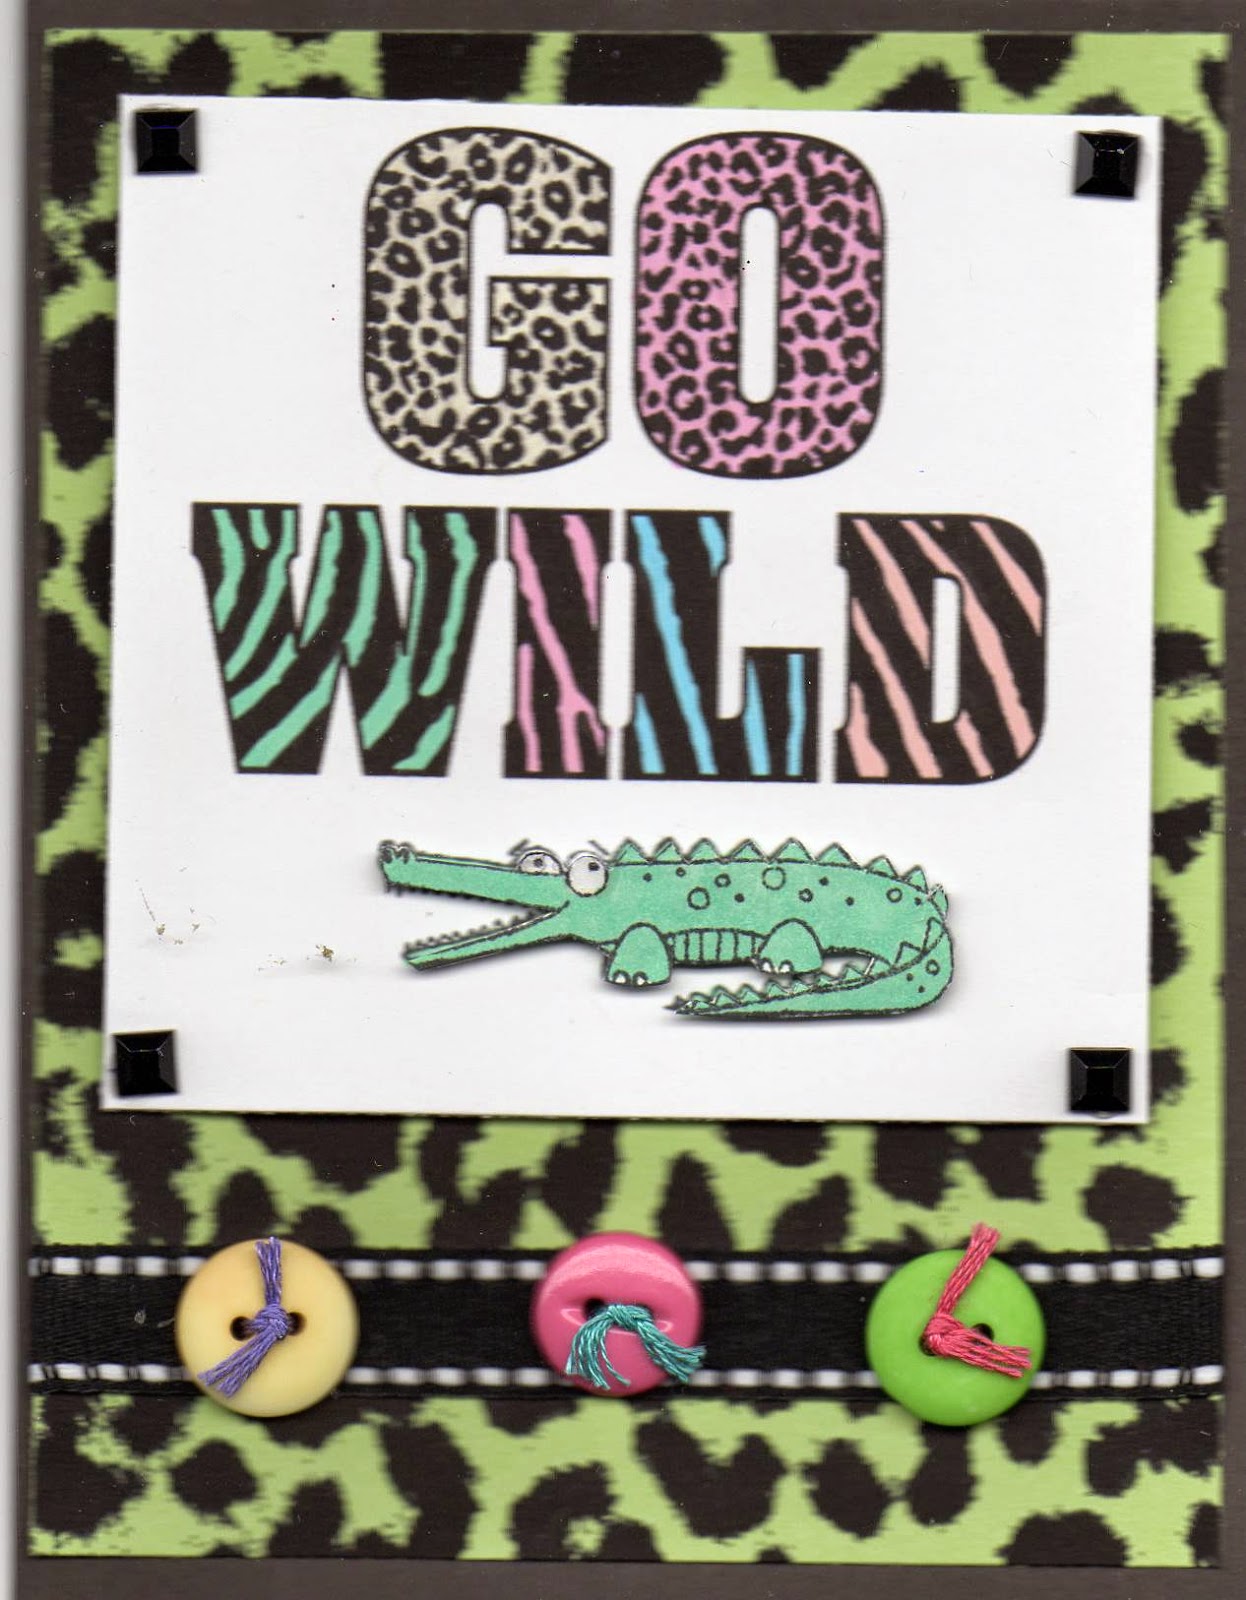
The card is actually very bright and colorful.  I ran the leopard digital print through my computer with black ink on a lime green card.  I then printed out the sentiment and colored it with my new neon Sharpie markers.  I love the neon!  The alligator (or is it a croc?) was from an older Hero Arts set of cute little animals and is actually stamped twice, once on the card and then a top layer is cut out, colored with Sharpies, and adhered with dimensional tape.  I used Glossy Accents for his eyes.  I think this would be another perfect card for a birthday.
     The thing I most like about the digital stamping is that you can adjust the size of the image.  Plus, I don't have to store another stamp!  I am a novice and I have found not all files will work on my computer.  I like the Winnie and Walter program (see my blog blinkie) because they have two formats of their digital images and at least one will work on my older computer.  Hero Arts was very accommodating--they sent me an actual CD from which I could download the images.
     I guess I am going wild with making cards right now!  I started going to a new church since my previous church is just too far away to feasibly drive to now.  When I heard they needed some cards on a regular basis I volunteered to help them out.  It's fun, and I think my efforts are appreciated.
 

Friday, August 29, 2014

Happy Birthday to You!


Happy Birthday to you!  This card is for you!  I know I have missed lots of birthdays, so consider this your card from me!  I had a lot of fun making it.  The background stamp of the shaker is Hero Arts Birthday Blackboard K5872 which I inked with a beautiful Clearsnap orchid pigment ink.  I then assembled the shaker using my Paper Trey Ink Shakers and Sprinkles kit, using some Valentine heart sequins for the shaker element.  I also have made this card with shaker silver sequin stars, which I like even better.  The stamped cupcake is also Hero Arts, which I "iced" with my new white Wink of Stella glitter pen.  I added pink glitter glue and some rhinestones and beads to decorate the cupcake.  I think this card looks good enough to eat!

Monday, August 25, 2014

Morning Timer Challenge . . . .

.....which I did not meet!  Here is my project:


Here is the link to the original project guidelines:

http://nicholeheady.typepad.com/capture_the_moment/2014/08/stamp-a-faire-opening-ceremony-and-morning-timer-challenge.html

I had a couple of problems:
                1. For a standard A2 size card, I could only fit four of my chosen stamp (Amuse Art Stamps).
                         Solution:  I made two cards, one A2 size (pictured above) and a much larger 5" x 7" card,                                           which accommodated all the colors in the palette, but didn't really work as a card
                                        - -too much white space.
                2.  I couldn't keep my images in line.
                          Solution:  I used a stamp positioner--solved the problem, but time-consuming.

So, I did not meet the "time" requirement, but I did end up with a card I can use!  I kind of like it!


Saturday, August 23, 2014

Stamp a Faire: Regency period

Melissa Phillips shared how to "antique" a gold embossed piece.  Here is the link:  http://nicholeheady.typepad.com/capture_the_moment/2014/08/saf-2014-explore-the-regency-era-with-melissa-phillips.html

I did not use a frame, but a medallion.  The stamped flowers are from the Paper Trey ink County Fair kit, and the Happy Birthday sentiment is from Shakers and Sprinkles.  Here is my project:


The papers are from Anna Griffin--so elegant, perfect for the Regency period.  My large tag is made from gold cardstock.

The other project from the Regency period uses stitching.  I cross stitched all day practically to get the stitching done.  That's why I am so poky on making my projects!  I hope to be able to finish that card on Monday.  I am taking a break tomorrow, and now it is time to retire for the night!  I enjoyed all the projects at Stamp a Faire.  Thank you for a fun time.

Stamp a Faire: 1940's

This afternoon we were able to visit the 1940's courtesy of the talented Betsy Veldman, who showed a wonderful "tablecloth" motif stamp set used with repetition pattern stamping.  Here is the link:
http://nicholeheady.typepad.com/capture_the_moment/2014/08/saf-2014-explore-the-1940s-with-betsy-veldman.html

This entry reminded me of the County Fair Paper Trey set of stamps and dies I purchased earlier this month.  Actually, Betsy was the designer of that set, and I think she presented a card on her website similar to what I am doing here.  Instead of using a stamp as the defining large element, I used the quilt die from the set.  Here is my card:


You will have to disregard all my "stamping outside the lines".  I am not quite used to this set but I really enjoyed playing with it this afternoon.  I love sewing and quilts all things homemade and crafty.  I think this will make an excellent birthday card if the inside sentiment says "Birthday Ever!"  the black numbers on the "ribbon" are stamped with an old Amuse Art Stamp clear set of numbers I had.  I like that the set came with a -st, -nd, etc.  If I make this card again (and I will), I will make the number white rather than black.  Thank you, Betsy, for a fabulous idea and a fabulous stamp set.  I love my County Fair set!

Stamp a Faire: Renaissance

The next stop on the Stamp A Faire was the Renaissance.  Nichole Heady shared the stamping on velvet technique and using wax seals, real and faux.   Here is the link:  http://nicholeheady.typepad.com/capture_the_moment/2014/08/saf-2014-explore-the-renaissance-with-nichole-heady.html%20
   I had not used these materials in years, so I dragged out a rather wrinkled scrap of green velvet and got to work.  Luckily, velvet irons very nicely.  I think the image I chose (Hero Arts) is a little too big for this project.  My card ended up gi-normous (6" square) but I did find an envelope to fit.  Here is apicture of my card:

I used Spellbinder's dies to complete the card.  The JOY in the center is from the Paper Trey Ink Shakers and Sprinkles kit.  I think the card is rather elegant with the gold cardstock and the embossed elements, but my husband thinks it is rather plain.  He says he has gotten too used to looking at all my "fancies"!

Stamp a Faire: Ancient Rome

Our first stop along the Stamp a Faire was Ancient Rome.  I viewed some excellent videos by Lizzie Jones at the Paper Trey Website on using frescos and mosaics as inspiration for cardmaking.  Here is the link: http://nicholeheady.typepad.com/capture_the_moment/2014/08/saf-2014-explore-ancient-rome-with-lizzie-jones.html
I worked on the fresco technique.  Here is my somewhat finished card:

I used an older Magenta giraffe stamp that I really like.  I think the Romans knew about giraffes!  Anyway, the Roman inspiration is in the fresco technique.  I loved watercoloring over the embossing paste!  I had never done this before and I made several panels.  I used Tim Holtz Distress watercolor markers in Tumbled Glass, Weathered Wood, Forest Green, Pine Needles, and Spiced Marmalade.  The challenge stipulated that we had to use at least one Paper Trey ink supply in each project, and I have only two sets of these, so coming up with an idea was a challenge.  I used the sun from the Shakers and Sprinkles set and the sentiment from the County Fair set.  The background is scrapbook paper I have had forever and looks good with a hot sun and giraffes.  Thank you, Lizzie Jones, for this technique.  I guess an old stamper like me can still learn some new techniques!

Friday, August 22, 2014

Stamp a Faire 2014

I am getting ready for an amazing event tomorrow.  It's hosted by Paper Trey Ink (https://www.papertreyink.com/) and consists of videos and projects all day long.  The theme is what intrigued me:  it's a travel in time, from ancient Rome to the Renaissance to the 1940's and beyond.  Each segment of the day is devoted to a different time period and stamping techniques are presented that showcase each era. 

    This picture shows my worktable as I have cleared off a space to work and gathered my supplies--from basic stamps and inks to velvet and flower stamens.  The company offered a package for sale earlier in the year that contained supplies for the event, but, not knowing anything about the annual event, I missed the opportunity.  However, those of you who know me know I have tons of things to use and I will have to be creative.  That's what the day is all about, and I am looking forward to doing some projects hosted by some talented designers like Betsy Veldman and Maile Belles.  
   I hope to show pictures of what I come up with after the event.