Tuesday, July 17, 2012
Gearing Up
This week I am playing around with borders and backgrounds, in preparation for my class this Saturday. I wanted to use this gear stamp (in orange above) from Stampabilities. I had this image of large colorful gears arising from the smaller gears in the stamped image. Alas, no large gear stamp! No gear chipboard shapes! No gear die or punch! But wait--I did have a gear die--from Tim Holtz, and it was perfect! Well, not perfect--it was an on the edge die--I still haven't invested in his larger gear shape (which I do see coming to my craft room soon, along with lots of robot stuff--don't ask me why). The only problem with this die was that it did not cut out a complete gear shape--only the tops. I played around with forming a complete gear shape from two cut ones--that didn't look so good.
But actually, the on the edge die did work, as you see in the project above. I cut the shape in various primary colors and added them to the card--on the edge! Success!
Labels:
gears,
On the Edge gear die,
primary colors,
Tim Holtz
Sunday, July 8, 2012
Denami Blog Hop: Summer
Welcome to the Summer DeNami Blog Hop! You should have arrived here from Lisa's blog at http://mypapertales.blogspot.com/. If you get lost during the hop you can always start at the beginning: http://www.denami.blogspot.com/
I thought this would make a super "Have a great vacation" card. I stamped the shirt three times on Basic Grey patterned paper with Colorbox pigment inks in various colors and then heat embossed them. The palm tree is stamped in green and brown Colorbox and heat embossed then colored in with green and brown pigment inks with the Colorbox stylus and heat embossed again to set the inks.
The background for the large 5" x 6 1/4" card is covered with square "tiles" of various colors of Basic Grey cardstock. The tiny tiki hut was stamped with Memento brown ink down the center tiles. After adhering the shirts and pine tree I computer generated the sentiment and printed it on Basic Grey yellow card, added a tiki hut and a fish brad.
Are you packed for your vacation yet?
Now it's time to visit Linda at: http://creatingingodsimage.blogspot.com/
Wednesday, July 4, 2012
Colorful Flamingo
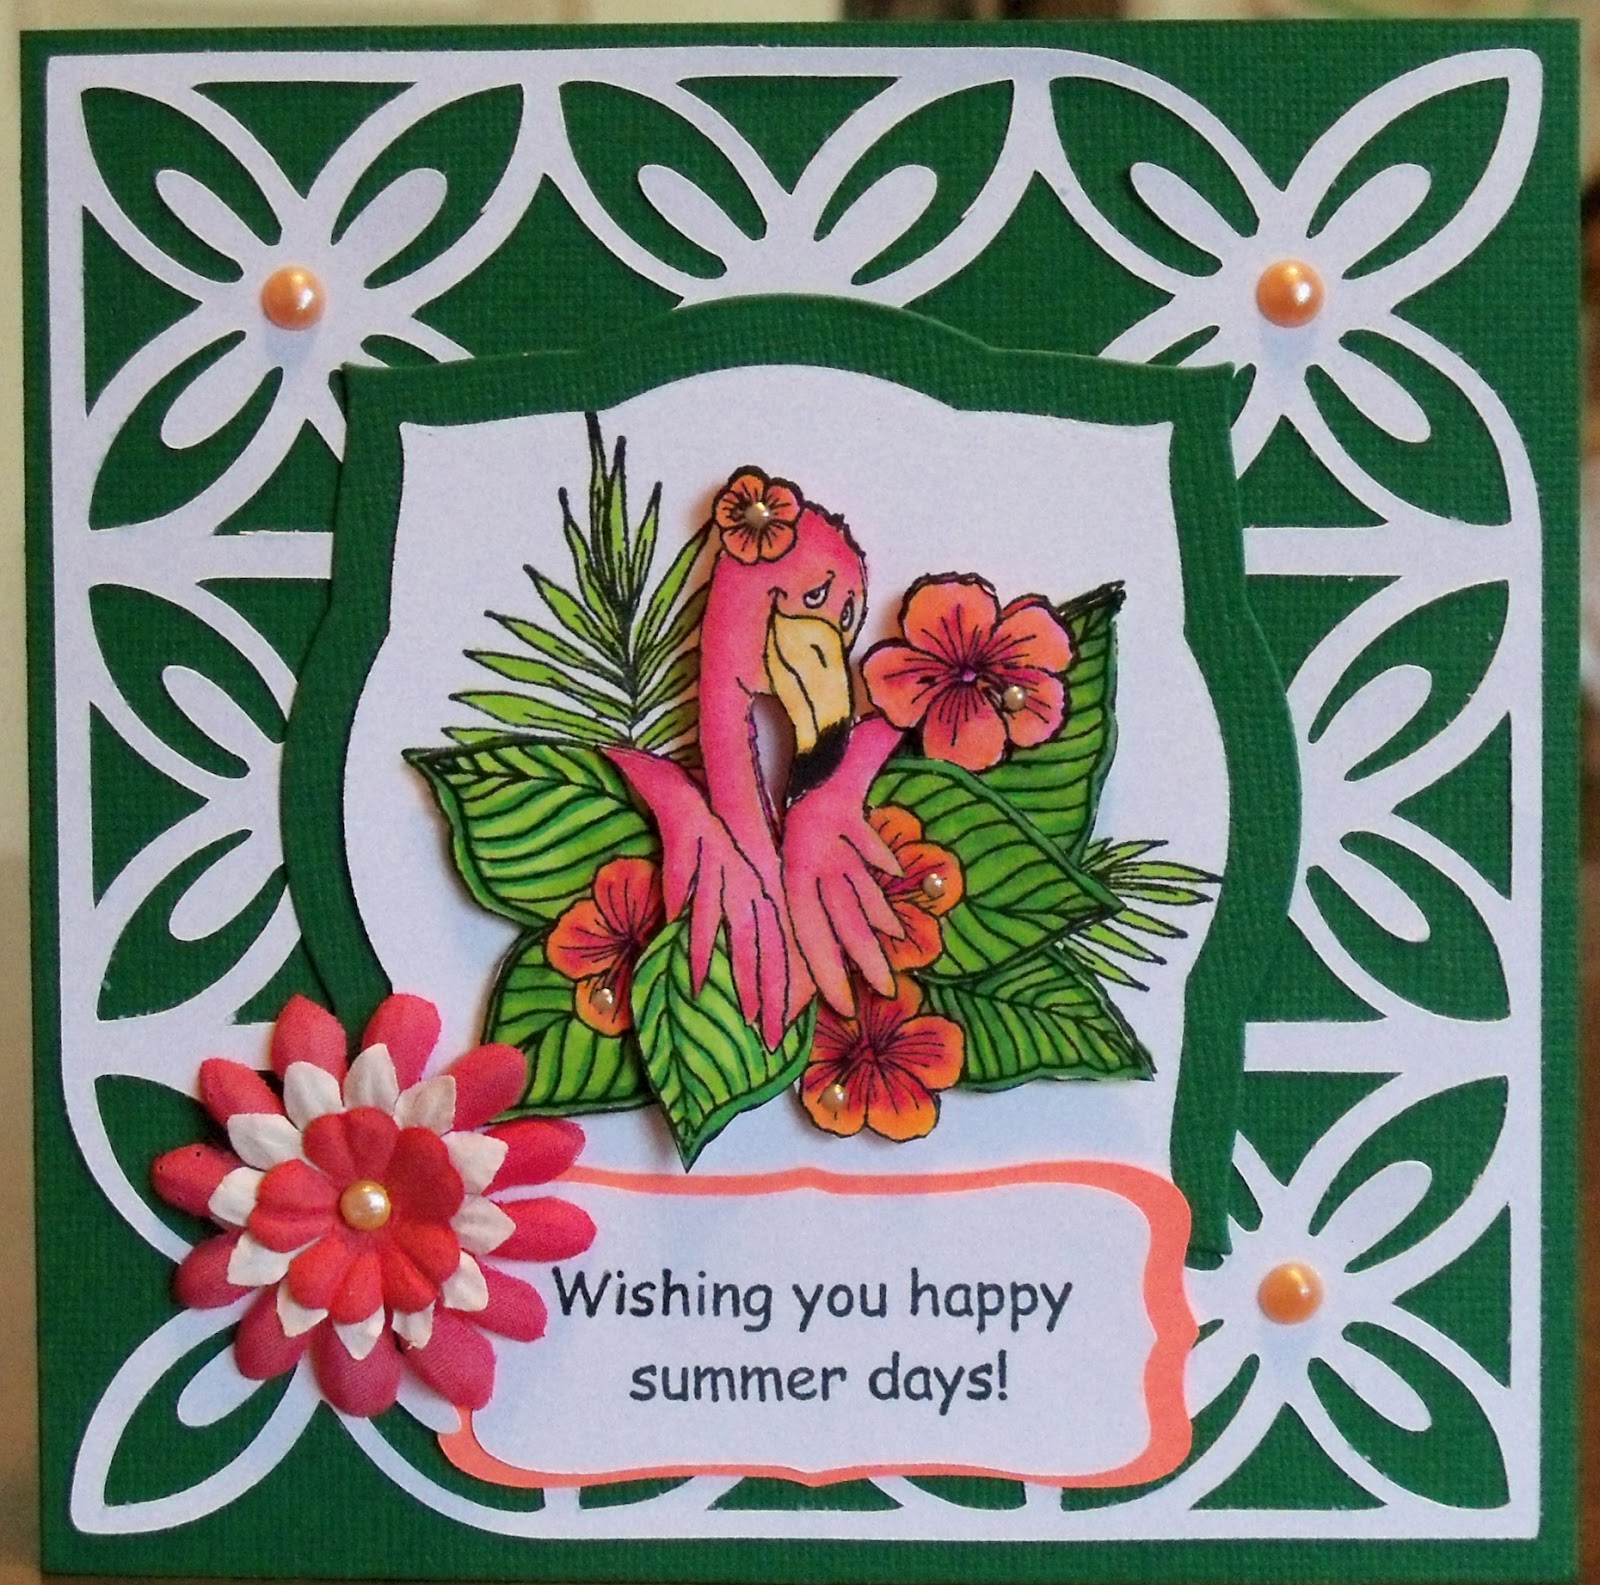
Happy Summer! And this cute little flamingo is coming your way to help you enjoy the beach, vacation, picnics, ice cream, or whatever helps you beat the heat this summer. I loved coloring this little guy with my Copic markers. That's a good thing, since I had to color three or four images of the flamingo to layer it properly! There are three distinct layers to the flamingo, each one held in place with dimensional tape. And no, you are not seeing things! I did "alter" the image by adding a few extra leaves in extra places. I wanted very lush foliage! The central flamingo image and green border are cut with Spellbinder's Nestabilities dies.And thank you, my little Cricut! I cut the white lacy background from the Cricut Paper Lace cartridge. I think it is called Blossom1, and I cut it at 5 1/4". I also cut the label for the sentiment from Accent Essentials, altering it in Cricut Craft Room to make it fit the sentiment better. I added a layered flower and some pearl accents with the Viva Decor Salmon Pearl Pen. If I can't go to Disney World this summer, I can at least color my world as if I were there!
Friday, June 29, 2012
Leftovers
I rummaged through a box of unfinished cards the other day and decided to finish one! This is of course a design from a previous Card Factory class I did. I think some rhinestone bling will add a lot to this! Aren't those Copic colors vibrant?
It seems like my life is full of leftovers these days--leftover class kits, leftover supplies I thought I needed but really didn't, leftover debris from my last crafting project, leftover over food in the refrigerator because the restaurant served too much or I cooked too much! Do you have leftover gift bags that just seem to hang around and never seem to get used a second time but are too good to throw away? I just pitched a bunch of leftover gift bags and other debris cluttering my closet. The recycle bin is now full and I feel a lot better! Now I have to set my mind to finishing all those unmade cards and sending them out. (No, I am not throwing those away--I will let the recipients do that for me!) A simple thing--decluttering. Take joy.
Sunday, June 10, 2012
Denami Blog Hop June: Cards for Guys
Welcome to my entry for the DeNami Cards for Guys Blog Hop! You should have arrived here from Lisa's blog: http://bellalistona.blogspot.com. If at anytime you get lost or want to start over, here is the main link to the Blog Hop: http://denami.blogspot.com/2012/06/cards-for-guys-blog-hop.html
I know all the guys want to go to tropical islands and relax in hammocks and drink exotic concoctions and be fed fruit by beautiful girls (yeah, yeah--dream on....!) So I decided to use the DeNami pineapple stamp as the focus of my blog hop projects.
Directions: Ink pineapple with yellow ochre and olive pastel colorbox
chalk ink. Stamp repeatedly over the
front of a yellow A2 notecard. Stamp
sunny days with black dye ink on a yellow strip. Back with a peachy-orange strip of Basic Grey
cardstock. Center onto notecard. Attach a strip of printed paper tape (This paper tape was a lucky find at Target--I think it's a kind of Washi tape)
with a peachy color print. Stamp three
separate pineapples with same ink onto white card. Color with Copic markers, then overstamp
again with the same inks to give emphasis to the stamp lines. Cut out the pineapples and attach with dimensional tape to
bottom center of card front.
Same stamp, different take: Cut 1 1/2" squares of lime-green Basic Grey cardstock and also of peach. Cut the peach triangles in half and lay on top of the the green squares. Attach all to a 3" square of white card in the manner shown. Stamp pineapple in the center. Stamp pineapple also on peach card, cut out fruit portion and piece onto the stamped center pineapple. Attach this square onto a white notecard covered with Basic Grey printed paper. Punch 1" squares of green and peach card. Attach these along a narrow white strip of white card to make a border. Stamp "sunny days" along border. Draw "stitch" lines with a black pen around "quilt pieces".
Take 3: I have been playing around with some sketches I designed. The sketch I used in the card above was originally designed for the Tim Holtz' Umbrella Man stamp. I adapted the design to suit the pineapple. First, instead of using actual book text paper like I did in the original, I printed out vacation words on the computer to a text box and then ran them on some text weight linen paper. This was used as the left border of the card. I then stamped and heat embossed the pineapple in copper on peach card and matted it with black. For the lower border, instead of using tissue tape, I used some Basic Grey printed cardstock. OOPS--I got the border a little crooked. ( I had wanted to use the Target paper tape I used in card 1 above, but it looked washed out over the text.) I forgot to say that before I started decorating my card I first printed the sentiment onto the card with my computer. The card looks peachy in the sample above but is actually manila. I generated the scallop border with my Cricut Ribbons and Rosettes cartridge and laid it over the text box edge.
Here is the original card I designed this sketch for, and you can compare how I adapted the sketch to the DeNami image:
Thank you for looking! I hope you have come away with some fun ideas. Don't forget to leave a comment, because prizes are being given away! How do you think I get my stamps?!!!
To continue the Blog Hop, you will visit Christine at http://christinezani.blogspot.com/
Saturday, June 9, 2012
Two Items of Note
Note 1: Join me tomorrrow for the June DeNami blog hop featuring Cards for Guys. Any comments posted on my blog or any of the participating blogs will be eligible for prizes from DeNami. Last month I won a $20 gift certificate to their store and I bought some really cool stamps!
Note 2: Check out my Class Information tab above to see the latest class sample. If you love all things Tim Holtz you are going to love this upcoming class on June 23!
Sunday, June 3, 2012
Video: Card with Reverse Stamping
I love these red and black Jenni Bowlin papers! They make me think of upholstery and wallpaper, so I combined them with Hero Arts Wishing You Were Here clear stamp set CL480. I like the idea of the chairs facing each other, so I decided to do some "reverse" stamping. Here are a couple of videos that show how I started the card and did the reverse stamping:
The first video shows how I organized the card itself: Watch at YouTube:
This video actually contains the reverse stamping: Watch at YouTube:
To finish the card, I added a black border cut from Cricut Ribbons and Rosettes cartridge, added a "rug" and a table, and put accents on the chandelier with Viva Decor Pearl Pen in Ice White and gold Stickles.
Thanks for looking!
Subscribe to:
Posts (Atom)